Tuesday, January 30, 2007

Trying to Take Marvie


In a nutshell, here's what happened at Marvie:

Striking at Bastogne through Marvie was the mission given to KG Hauser, which consisted of Pz Lehr's 901 Pz Gren Regiment and the Pz IVs of the 6/130 Pz Coy. They attacked the hamlet on the evening of December 23rd, the night affording some protection from the Allied fighter bombers that ruled the skies in daytime.

Marvie was held by Team O'Hara, defending the NW corner with help from the 609th TD Bn and the 2d Bn of the 327 Glider Inf Regiment, which was positioned along the south. These units had been shelled all day when the bombardment suddenly increased and was followed by an infantry rush on the the hill to the south, which overlooked the town. The glider infantry detachment was surrounded and destroyed.

A German half track, followed by four tanks from the 6/130 tried to exploit this victory and travel down the hill into the town, but the halftrack leading the group was knocked out and blocked the path of the tanks.

At this point, 12 more German Panzers and Infantry tried to force their way through on the Arlon-Bastogne road, which ran through the town, but these where beaten before they reached the town.

After midnight, the Germans renewed their attack, and with an additional 15 Panzers supported by infantry, they were able to take the south half of Marvie. The cost to the Germans was 8 Panzers for the night's attack. The town lay divided as the morning light broke into the sky and it would remain that way for days to come.

To learn more about this battle, read Cole's chapter on Bastogne.

Tuesday, January 16, 2007

Marvie Mapping

To create an Airborne Assault map all you've got to do is open up the mapmapker utility that ships with the game.

Okay okay... it's not THAT easy. But it isn't rocket surgery either.

Below is an animated gif that shows the layers that have to be created to construct a map. Compare this gif with the map image below and you'll see the level of accuracy afforded by the Airborne Assault engine. This accuracy translates into in-game realism.


If you want to learn more about making a map, read this and then get started. If you run into trouble, post here. Lots of people want to help you.

The beauty, anyway, is in the finished product. If the game map matches the real terrain with any amount of accuracy, you've got the potential for facing the same problems that the commanders of the actual battle faced. This is one aspect of Airborne Assault that is unmatched in any other gaming system.

Next we'll look at the demands this kind of detail places on a commander in the Airborne Assault Engine.

Sunday, January 14, 2007

Maps & Map Creation

All of the tasks involved with creating scenarios require a lot of attention to detail, whether researching a scenario, creating historically accurate forces, or putting together the scenario itself.

Perhaps one of the most rewarding tasks is working on the game maps. The Airborne Assault engine utilizes extremely detailed maps. In many hex-based games, the maps are very good quality, but they don't have as much detail. A 1 km hex will have a list of attributes that generalize the terrain within that area. In Airborne Assault, the same 1 km x 1 km space will have up to 100 different types of terrain - all based on real maps from the period of the game.

Below is a 1943 U.S. Military Map showing the town of Marvie in the Ardennes. The town is just southeast of Bastogne and it was the location of significant fighting during the Battle of the Bulge as German forces sought to break through the defenses of the Bastogne perimeter and capture the city.


Looking at the map, one can see some significant tactical concerns for both the defender and the attacker. The small hamlet of Marvie lies in a draw and has a small stream which runs through it and another on its southern edge. There isn't much cover close-in - the woods are almost 1 km away in every direction.

An improved road runs east-west just to the north and east of Marvie - this will be one of the vital routes for the attacker. And it will mean that an attacking armored column will have to traverse a 2-3 km stretch that lies within 600 m of enemy guns. Within the town there is one minor road and 3 small roads.

To the south and the northeast, the terrain is higher than the hamlet. But with in the square km, there are six or seven changes in elevation. This will obviously be a strategic location within the game, just as it was within the actual battle.

Next we'll look at how the map will be portrayed in Airborne Assault: Battles from the Bulge.

Wednesday, December 20, 2006

Data Design Team Diary

A while back, I joined one of the Airborne Assault data design teams. More specifically, I joined the West Front data design team. That means I'm working on the upcoming Battles From the Bulge (BFTB) title, producing scenarios, editing force lists, researching battles, and sometimes working on maps. None of which is happening very quickly, because I'm a full time something else in the world of work, and a father of two young'uns at home.

But, I'm in all the way and hoping to learn something about developing a game. And, if you read this blog at all (I know updates haven't been happening in some time) you'll be able to learn a little too. I'm going to journal my experiences on the team and share some information about the development of the game.

None of the information is going to be a big scoop for anyone, so don't get your hopes up about me leaking game features and any other juicy tidbits. It's going to be a little more work-a-day scenario design stuff - not screaming tabloid headlines about new features. But I hope you'll get a look at what goes into the game and how the quality of the work makes the in-game experience worthwhile and enjoyable.

Thursday, July 20, 2006

It's a Mod Mod Mod Mod World

You can now get your map on with a handful of excellent terrain mods available at the COTA downloads page.

Tuesday, June 27, 2006

1st COTA Mod

0800: Breakfast is served!
Introducing a new terrain file by captskillet - the first player-made modification to COTA. He cooked it up using the existing terrain files from the game, in combination with previous terrain files modified by Data Design Team honcho Bil H.

Before:


After:


Mmmm. Nice rich brown colors - like an good cup of coffee. You can get this mod by shooting captskillet a PM on the Matrix forums. Read the post here.

Friday, June 16, 2006

co-TA! co-TA! co-TA! co-TA! co-TA!

It's out and it's awesome. Conquest of the Aegean (COTA) is available for download.

The improvements to the game engine are very cool indeed. My favorite is the new supply system, which adds a great deal of suspense to the game. Sometimes it works in your favor - you'll get artillery ammo a little more often. Other times, you'll struggle to keep your supply lines open - you can no longer take them for granted.

Another great feature is mixed-mode movement. Many units that have previously enjoyed the benefit of easy movement through many types of terrain will now feel the pain of poor and non-existent roads. In the image below, I'm thrusting Italian troops into the Pindus mountains to hopefully breakthrough and capture Greece before she can muster her entire army. But the mountains are killing my one chance of lightning breaktrhough. The armor unit, highlighted in a white box, is in terrain that let's it move at 2% of its normal speed. Ugh!

Friday, April 14, 2006

Data Design Teams

Currently, there are four DDTs (Data Design Teams) working on future releases of the Airborne Assault game engine for World War II: West Front, East Front, North Africa, and Pacific Theatre. And there is one “modern” team – though it isn’t clear yet what period of modern warfare they will begin with.

That pretty much gives you a look at where this game is heading – and it looks quite awesome. If you read this post, it gets even better.

Here are some future battles that are being talked about:

West Front:
Battles From the Bulge

East Front:
Chir River Battles

North Africa:
Graziani's Offensive
Compass
Rommel's first offensive
Brevity
Battleaxe and
Crusader

Pacific:
Guadalcanal
Finschafen

Monday, April 03, 2006

New Scenarios for HTTR


As spring turns to summer, I’m waiting impatiently for Conquest of the Aegean to ship. I’m sure you are too.

To help pass the time, you can play THREE excellent new scenarios for HTTR with new maps and units.

EPSOM and EPSOM Phase 4 by Pieter – you can get EPSOM at Elsavior's Site. For EPSOM Phase 4, you need to contact tukker per this thread at the Matrix forums.

These are an excellent pair of Normandy-based scenarios that focus on the battle between the British and the Germans west of Caen.

The maps are very well done, and the scenarios provide an enjoyable challenge – especially EPSOM Phase 4, which presents a “what if” the Germans hadn’t been reinforced by II Panzer in time to stop the inland thrusts of the Brits.

Here’s an excerpt from the “designer notes” which is an excellent piece of historical research and writing in and of itself:

Another unique feature of the division was the inclusion of an 8cm ‘Reihenwerfer’ (rocket launchers) battery in each of its Panzergrenadier Regiments. These Werfer were mounted on captured French tracked vehicles. I’ve substituted them with Nebelwerfer.

NAVARONI by Multetears - http://home.clara.net/headcount/Navaroni.html
Another fun to play Scenario is “The Guns of Navarone” scenario by Muletears, which recreates the daring operation portrayed in the 1961 movie.

You’ll have a hard time matching the daring feats of Anthony Quinn and David Niven, but please go ahead and try.

From the Movie:
Mallory: Are you sure it will work?
Corporal Miller: There's no guarantee, but the theory's perfectly feasible.

Wednesday, August 31, 2005

Happy HQ Birthday


I've been at this blog almost a year now, and have had nearly 6,000 page loads. That's more than I had imagined it would receive.

Thanks to kindly posters who left comments and to readers who have stopped by and lingered more than 10 seconds.

Wednesday, August 10, 2005

Google-eyed View of COTA


Just published a Google Earth walk through of COTA scenarios. Visit this BBS if you want to download
the file: LINK

In case you missed it...

These are the new features coming with COTA:

Realistic Resupply System
Mixed Mode Movement and Slope Effects
Realistic Delay Task
Exit Tasks
Linked Tasks
Map Improvements
Enhanced Interface, including:
- Order of Battle display
- Display Tool Bar
- New Planning Tools
- Message Log and filters
- SOP History Log
- Enhanced Terrain popup
- Improved Data displays
Improved AI, including:
- Force Allocation
- Reaction and Reassessment
- Formation code
- Retreat code
Additional Weather Patterns
Over 20 new maps
Over 1,000 new Estabs
Over 30 new scenarios
Force List Export/Import
Mod-able Victory Messages
Mod-able Terrain Key

Monday, June 20, 2005

Sources for Arras Battle

Here's a listing of the sources I've used thus far in compiling data for this little scenario:

HRN Horne Allistair - To Lose A Battle, Penguin Books, Harmondsworth, Middlesex, England 1984

RMML Rommel, Erwin and Liddell-Hart, Basil H.(editor) - The Rommel Papers, Decapo Press, NY, NY 1953

FSCHR Fischer, K. H., Blitzkrieg Legend Link: http://chrito.users1.50megs.com/karten/1940/arras21mai40.jpg Map is a scan from book.

USMA United States Miliatry Acadamy Map Collection Online. Map: Northwestern France, 1940. Campaign in the West 1940, Situation 21 May and Operations Since 16 May Link: http://www.dean.usma.edu/history/web03/atlases/ww2%20europe/ww2%20europe%20pages/ww2%20europe%20map%2012.htm Map is from scanned from unknown source, probably: Atlas of The Second World War: Asia and the Pacific (Wayne, NJ: Avery Publishing Group, Inc., 1985).

SPRHD John Moher, Spearhead Games Website, 1997-2000 Link: http://www.geocities.com/ww2spearhead/06grob01.htm Games Website with OOBs and Rules

WKPD WikiPedia: British Expeditionary Forces; Modified 3/27/2005 Link: http://en.wikipedia.org/wiki/BEF#World_War_II

FLDGR Online message board at www.feldgrau.com

WW2DB World War II Data Book, Essential Facts and Figures for All Combatants. John Ellies, Aurum Press, London 1993

LEX German language website about SS formations: http://www.lexikon-der-wehrmacht.de/Gliederungen/SS-Divisionen/SSDivTK.htm

TIL HPS - France 1940 Game OOB

NIEH Niehorster Website: http://niehorster.orbat.com/011_germany/40_organ_army/_40_org_army.html

5th Panzer OOB

This outfit participated in the Arras counterstroke not at all, I think. But they were in very close proximity to the battle, holding down the right flank of 7th Panzer along the Scarpe river.

5th Panzer Division


8th Pz Brigade
31st Panzer Regiment
1.Abt.
2.Abt.

14th Panzer Regiment
1.Abt.
2.Abt.

8th Panzer Reconnaisance Battalion

5th Shutzen Brigade
14th Rifle Regiment
1.Btl.
II.Btl

13th Rifle Regiment
1 Btl.
II.Btl.

13./Schtz.Bde.5

89th Pioneer Battalion (Motorized with Bridging Equipment and Armor)

77th Signals Battalion

53rd Antitank Battalion

116th Artillery Regiment
1 Btl.
II.Btl.

Wednesday, May 25, 2005

Dreaded 88

It was at the high watermark of the BEF's attack that Rommel is reported to have employed the 88mm anti-aircraft gun as an antitank weapon for the first time, easily defeating the heavily armored Matilda, and halting the attack.

I wrote the above quote believing that this was indeed the momentous occasion in which the 88 became the dreaded weapon of the Germans. However, it is apparently not so. 88s were pressed into anti-tank service in Poland and possibly even Spain. I'm looking for more info on this.

OOB for Rommel's Ghost Division

7th Panzer Division

Armor
25th Panzer Regiment (of three battalions)
1.Abt. 44 x Pz II, 19 x Pz IV
2.Abt. 44 x Pz II, 19 x Pz III
66.Abt 44 x Pz 1, 19 x Pz III

37th Panzer Reconnaisance Battalion
2 x 75mm how
3 x 37mm anti-tank
3 x 81mm mortar
48 x armored cars

Infantry
6th Rifle Regiment
1.Btl. 8 x heavy m.g., 6 x 81mm mort.
II.Btl 8 x heavy m.g., 6 x 81mm mort.

7th Rifle Regiment
1 Btl. 8 x heavy m.g., 6 x 81mm mort.
II.Btl. 8 x heavy m.g., 6 x 81mm mort.

s. Inf. Gesch. Kp.705
2 x 75mm ho
3 x 37 mm anti-tank

7th Motorcycle Battalion
54 x light m.g.
15 x heavy m.g.
9 x 50mm mortar
6 x 8 mm mortar

Engineers
58th Pioneer Battalion

Artillery
78th Field Artillery Regiment
Battalion x three four-gun batteries

42nd Antitank Battalion

Tuesday, March 22, 2005

The Battle of Arras

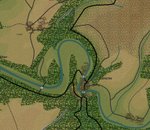
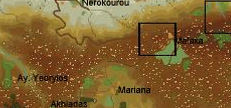
I’m announcing (very prematurely) my hopes to make an expansion pack for COTA that will cover a small part of the battle for France in 1940. Specifically, I will be working on a map, force list, and scenario for the battle of Arras. Below is some background on the battle.


At first glance, the British counterstroke at Arras appears to be a small gesture of defiance in the face of the overwhelming German blitzkrieg. Pitting two battalions and some slow-moving, underpowered British armor against the vanguard of the entire German panzer army seems like jabbing a penknife into the snout of a charging rhino. But Alistair Horne, in his book "To Lose A Battle", paints the British-lead strike as an engagement that may well have been the most decisive battle in all of WWII. And when you look at the battle, and think about the outcome, he may well be right.

Pouring forth from Germany, the Panzer Divisions had driven hard against the faltering French for 10 days. On the May 20, 1940 the foremost Panzers reached the English Channel. In the words of Horne: "The dog tired Panzer crews filled their lungs with sea air and wondered in amazement at how much more they had achieved than the Kaiser's army before them."

In the process of reaching the sea, they had encircled the British Expeditionary Force (BEF) in a pocket along the coast, leaving the BEF with the option of either fighting its way out or evacuating via Dunkirk. Lord Gort, who commanded the BEF in France was, by this time, chiefly concerned with ensuring the survival of the BEF as Britain's primary ground force. However, at the most senior levels of the Allied armies, an operation was conceived for the British and French to make a concerted strike at the Panzer column that had encircled it, and to cut off the "head of the tortoise."

The position of the Germans at this point was indeed tenuous. In addition to out-doing the historical achievements of the Kaiser's army, the lead elements of the Panzer thrust had also outstripped their real-life infantry counterparts who were miles behind them. As a result, what separated the BEF and a number of French units from the main body of the French was a thin "Panzer corridor" absent of the German troops needed seal the fate of the BEF.

The great Allied counterattack was slow in coming together, as coordination between the French and the BEF was poor, and French seemed to be reeling from the devastating psychological effects of the Blitzkrieg. And there was the problem of resources. Attacked on every side, it was difficult for the British and French in the pocket to pull units out of the line and commit them to the attack. So, what was conceived by the higher ups as a strike by four divisions, would only be a riposte of two battalions of the BEF’s 150th, some armor and little to no support from the RAF.

A limited attack to interrupt German communications and supplies was all Gort felt he ever could accomplish. But like a pebble thrown into a pond, the ripples of Arras would eventually reach Berlin. Gort waited only a brief time to see if French support would materialize. Then he moved into action.

The attack was launched on the afternoon of May 21, 1940 and was lead by General Martel, Britain's foremost tactician in tank warfare. On the extreme right, the French provided a force of cavalry tanks and guns to cover the flank of the attack. Martel divided his forces into two columns. One equipped with 50 Mark I tanks, the other containing 16 Mark II tanks, called "Matilda's." Both the Mark I and the Matilda were infantry tanks - heavily armored, under-gunned compared to the German tanks, and slow moving.

The attack trundled into its first objectives, and scored early victories against German troops that had grown accustomed to easy wins. It was not long, however, before the Stukas arrived to drive the BEF infantry to ground. The armor kept on going without the infantry, achieving success against the opposing forces. But, without the infantry to make good on the ground gained by the armor, the attack became overextended and began to falter.

It was at the high watermark of the BEF's attack that Rommel is reported to have employed the 88mm anti-aircraft gun as an antitank weapon for the first time, easily defeating the heavily armored Matilda, and halting the attack. Eventually, the 25th Panzer arrived to reverse the BEF’s gains.

Two days later, without the approval of his superiors, Gort began pulling his troops back toward the beaches of Dunkirk. His motive was clearly to preserve the BEF.

In all the attack achieved a only marginal battlefield victory in men and material for the BEF. The Germans reported to have lost significant numbers of men and tanks. The BEF also lost the greater part of its tanks. But the psychological victory of the British over the Germans was the achievement that may have been the most decisive of the war. The attack by Martel and the tough skin of the Matilda must have shaken the Germans. Horne describes the them as feeling a certain amount of disbelief that their attack was going so well to begin with. German reports filtering back to the high command described hundreds of enemy tanks and five enemy divisions. By the time of Arras, the Germans were apparently ready to believe that they had finally run out of luck. And so they paused.

This temporary abatement gave the British time to pull back and organize the “Miracle of Dunkirk,” which returned the BEF to England, giving the English the confidence and spirit to resist Hitler and buying time to bring the U.S. and the U.S.S.R into the war and assure victory over the Third Reich.

Gort would also survive the German Blitzkrieg, but one can only imagine the effects of Dunkirk. Monty - who was then only commander of the 3rd Division - met Gort on the beaches of Dunkirk amidst the evacuation and wrote in his diary about Gort "C-in-C very pathetic site, a defeated and dissapointed man."

But there can be no denying Gort's tremendous achievement in stepping forward and delivering a major psychological blow to the Germans at Arras thus preserving the BEF to fight again another day.

Sunday, March 13, 2005

Pardon My Dust

I have to find a new host for the files for this site. The host where I store the images and game files is being transferred to another owner. Therefore, you'll not be seeing the images and "stuff" for a while.

In other news, I embarassed myself today by completely forgetting what the password I used for my saved tournament game. I sent the file to Panther and I hope they can dig the password out of the file for me.

So, rather than finish up round one against Isacco, the Milano Master of Disaster, he and I started a new game against one another: "Battle of the Boxtel Bases." I took command of the vaunted Axis forces, and Isacco lead the Allies. We played for two hours and I have to admit that he is getting the better of me. Before we could finish, my son woke up from his nap, and my wife strolled in to remind me of the things I needed to get done, so I had to save the game and bid Isacco farewell till next time.

All this while he was driving a Guards armored regiment right across my flank, threatening to envelope the entire 1034 infantry regiment in Boxtel proper. I had recognized the threat and had given them orders to pull back from the city, but they were so war weary, I couldn't get them to move. Grrrrrrr.

Mercifully, I won't have to watch the disaster unfold for another week or so.

Tuesday, March 01, 2005

Another Hero Gone

Last week, Bill Kasson passed away. He was a childhood friend of my father, and they served together in the U.S. 71st Infantry Division during WWII.


The picture above is of my father (left) and Bill. The photo was taken at Stanford University after they finished basic training. They were enrolled in specialized training programs at Stanford when suddenly they shipped to Europe as replacements for the many soldiers who were wounded or killed in the early fighting of the invasion of France.

In the photo, they look excited and proud; ready to embark on the adventure of a life time. And what an adventure it was - across France, into Germany, and ending the war in Austria. Bill carried the 45-lb base of a 81 mm mortar a good part of the way, through eight river assualts, a handful of battles, and the liberation of a concentration camp.

Military life meant much to Bill - much more than it did to my dad. While my father was proud to have served and the war figured into his life in many ways, he never had the desire to wear a uniform again and never wanted to spend another night outdoors. Bill, however, spent 30 years in the military reserves and ultimately lead his reserve unit.

During the war, my father and Bill served in different regiments and saw little of each other. One of my dad's favorite stories was how, after crossing the Elbe in a small boat, he scrambled ashore to where a G.I. extended a hand down the river bank to help him up. It was Bill.

They were able to re-enact the happy moment in the 1980s when they followed the Division's path across Europe. Spending time with Bill remembering the old days brought my Dad much joy. In 1986 my dad died. Bill remained a devoted friend of the family ever since, and we will miss him.

I'd like to think that, as Bill went to go home to the Lord, my dad was waiting to extend a hand and help him up those final few steps.

Saturday, February 26, 2005

New Map Resource

The library downtown just got a new map scanner and they have a good collection of Military Service maps from 1942. Spent some time there today getting ready for the next project. Can you guess battle what it will be?